
Adjust the length and cut of the bodice for the best fit
Do you have trouble finding clothes that fit in stores? Me too! Do you know why? Well, our bodies almost never fit according to the size chart. I have three different sizes if I look at the size chart. My bust is large, my waist is smaller and my butt is two sizes above the waist. I'm not a model, but I'm unique and I'm completely uninterested in buying clothes for myself. But, the best thing about sewing your own clothes is that it doesn't have to be a problem.
Most of us small pattern makers in Scandinavia use a size chart that is based on the European standard (BS EN 13402-3). What is good to keep in mind is that this size chart does not have to match the size chart that different clothing chains use, as most have their own tables with their own measurements. So you may have one size at H&M and another in the table I use.
You might think that when you buy a sewing pattern you should only be able to sew straight up and down, and that's partly true. But the longer you sew, the more you learn about your own body.
The most common adjustment that needs to be made is to adjust the length of different garments to get the ultimate fit. When test seamstresses test sew, I try to find an average length where it is fairly close for most people, but that is far from always true.
For some patterns this adjustment is extra important, such as the Ingrid Peplum Top, Lotta Remake Dress or OmLotta, as both of these garments have a waist cut. Do you have a long or short torso? Or maybe you have a little belly sticking out, then this adjustment is for you!
The most important table can be found on the size page, and this is what it looks like for the Ingrid Peplum Top:

So how do you do it???
Step 1: Take your shoulder to waist measurement at the front

You measure from the center of your shoulder to your waist, or where you want the cut to be. Be sure to let the tape measure go over your bust. If you find it difficult to know where your waist is, it can be easier to tie a string around your waist and measure using a tape measure.
Example: If you have a size 46, then you can read that the measurement I have based on when I have drawn the pattern is 44.1 cm. If you get 42 cm, then you need to reduce by 2 cm to get the intended fit.

Step 2: Adjust the pattern
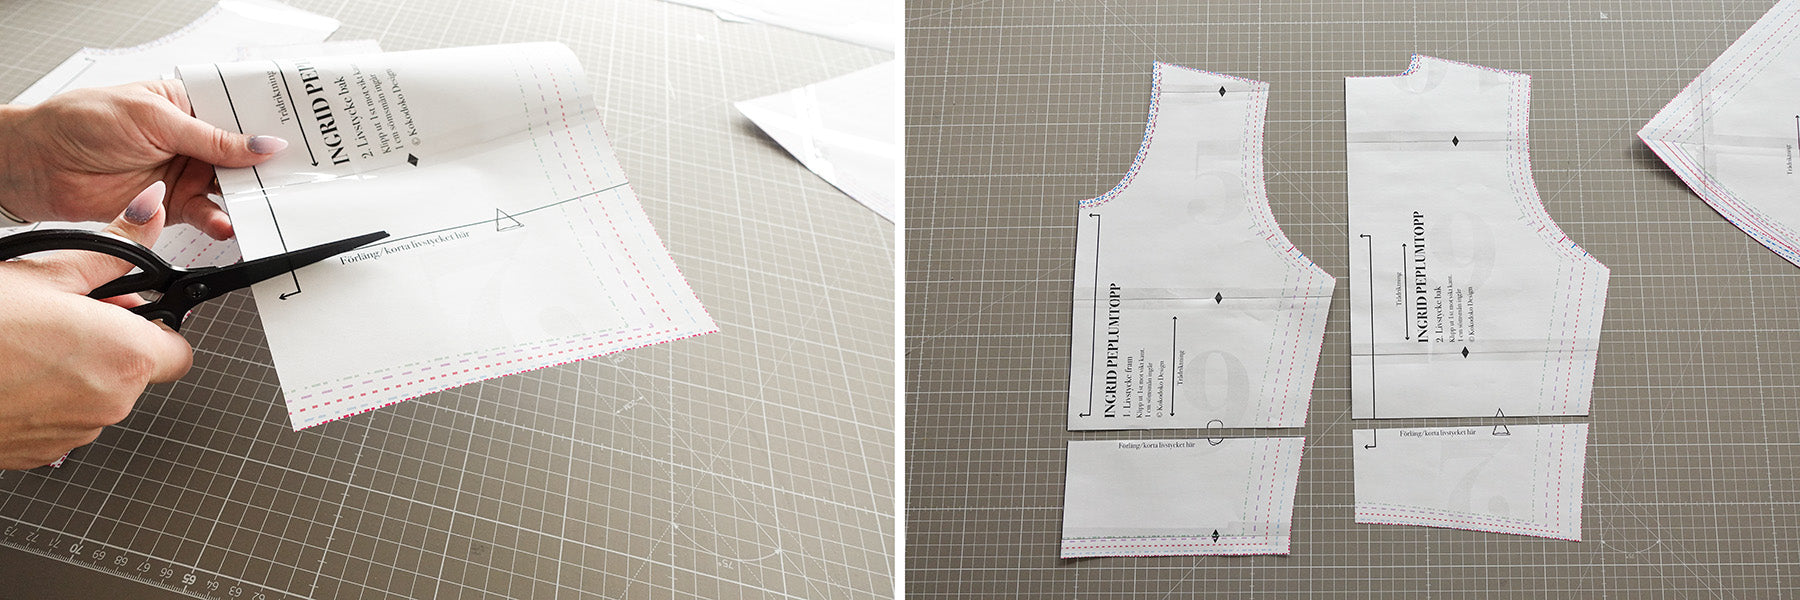
Now it's time to get out the pattern sheet. On the bodice you will find an extra line where it says “Lengthen/shorten bodice here”. If you have a printed pattern, it is important to draw your parts on a separate pattern sheet. If you need to adjust further, you always have the original pattern. Don't forget to draw the line where the lengthening/shortening should be done too!
To make it easier for you to see what I'm doing in the pictures, I've printed out the PDF pattern.

a.) Right above the extension/shortening line, I usually draw a circle on the front piece and a triangle on the back piece. That way I can easily see which part goes with which part.
Reduce the bodice

 d.) Then take your lower pattern piece and place the upper edge against your marking and tape together.
Lengthen the bodice


Adjusting the side seam


Keep in mind: Make the same adjustment on both the front and back so that the bodice matches. I did one of each to show the principle of both methods.
Adjust the skirt
If you make a larger adjustment, you may also need to adjust the skirt, especially if you choose to shorten the waist. If you shorten the waist, you may need to lengthen the skirt by the same amount to get the intended fit. You can also see this measurement clearly in the size chart, so it is best to measure and compare to see if you need to adjust it or not.
To lengthen the skirt, do the same thing as drawing an extra seam allowance at the bottom of the skirt. Start by taping some white paper along the bottom of the skirt. Then take a ruler or a ruler and draw out the same number of cm that you chose to shorten the waist by.


I hope this guide helps you succeed with a fit tailored to your unique body.
Good luck with your adjustment!


