Reduce the neckline on the Lotta dress
Share
Since we launched the Lotta Remake dress, we have received a lot of questions about how to reduce the neckline on the pattern. The adjustment is not as difficult as you might think. In this post, I will therefore go through @fab_n_sweet Lottas Super simple method to reduce cleavage.
Step 1. Prepare the facing
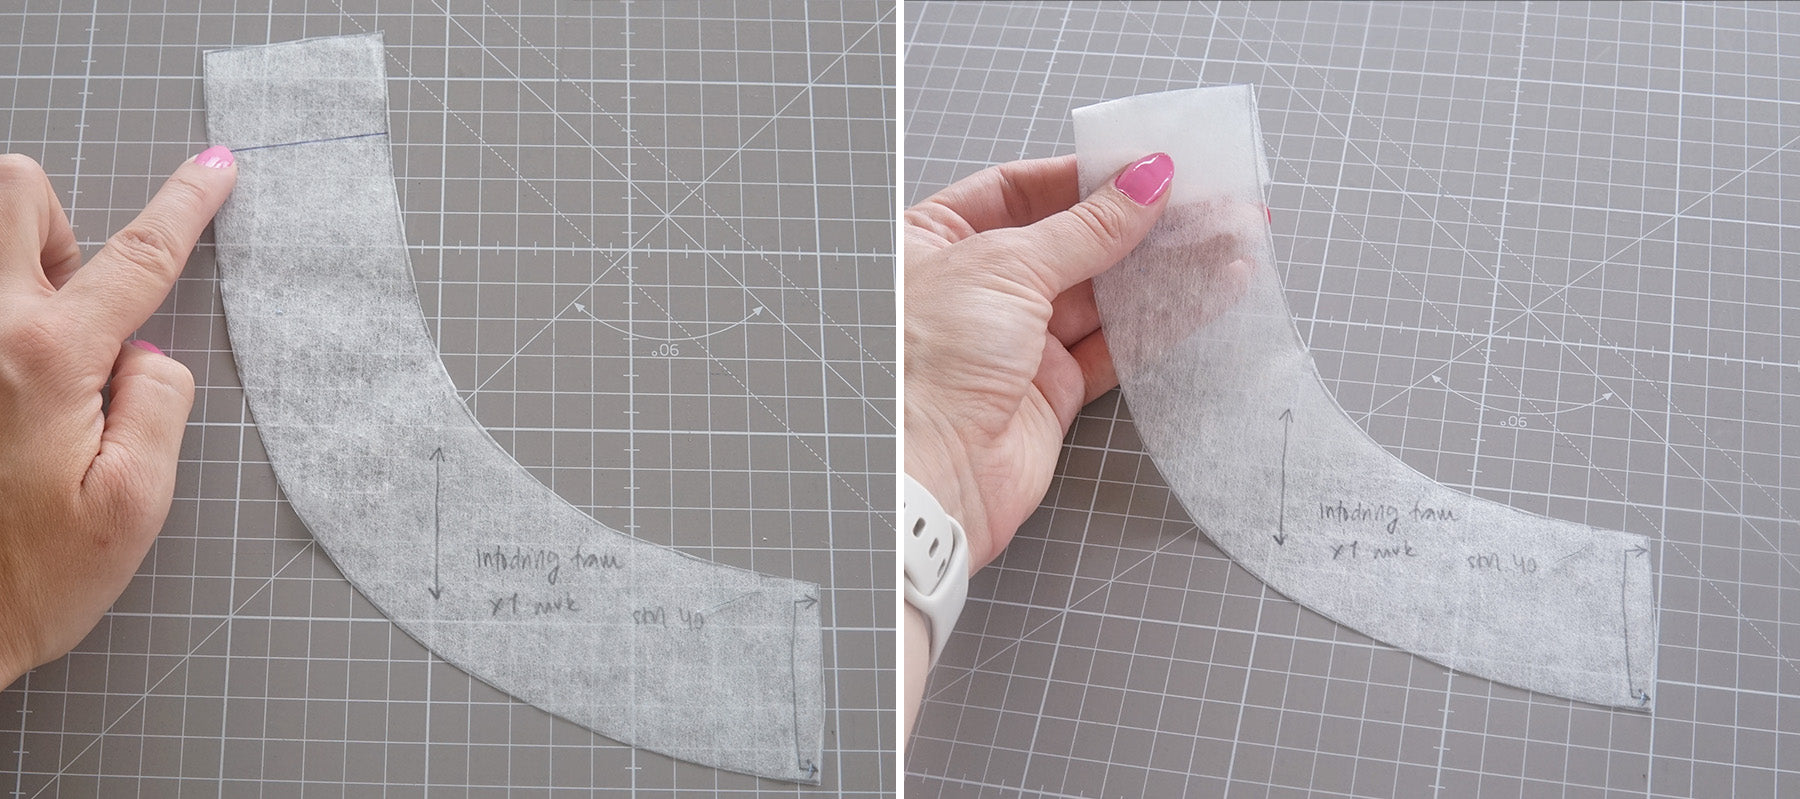
 The first step in adjusting the neckline is to take the facing and consider how much you want to reduce it. Keep in mind that the dress still needs to go over your head. It’s also important to remember that seam allowances are included in the pattern—once sewn, they will slightly enlarge the neckline. For reference, I reduced mine by 3 cm.
Measure from the shoulder seam on the facing the amount you want to reduce the neckline by (in my case, 3 cm), and draw a line. This line will be your new shoulder seam. Then fold the facing along the marked line.
Step 2. Cut out the front piece

Now it’s time to prepare the front piece and cut it out. Place the facing along the shoulder seam so it aligns properly. Since you've reduced the facing, it will now sit slightly above the original neckline. The edge of the facing is now your new neckline.
Cut out the front and back pieces using this adjusted neckline.
Step 3 Cut out the facing

Finally, it's time to cut out the facings. The back facing remains unchanged and should be cut out as usual. The front facing, however, should still be folded at the marked line to match the new neckline on the front piece.
Now simply cut out the remaining parts of your dress as usual and follow the sewing instructions provided in the pattern. You'll end up with a Lotta Remake dress with a lowered neckline.
Good luck with your neckline adjustment!


